SASCHA GREILINGER
INDUSTRIAL DESIGN STUDENT
DEUTSCH | ENGLISH

PHOTOBOOTH
Photomachine with retro bellow look
Semester Break 2017
Semester Break 2017
Everything started with the marriage of a friend of mine: There was a photobooth, and my friends and i used it very often, because it was so much fun. I wondered how different this kind of photography was, related to a real photographer. People do things in front of the booth, they wouldn't do in front of someone who takes pictures, just because it's kinda more intimate. It was certain for me: I wanted such a thing too!
But it should be a little bit more cute than six painted MDF boards screwed together, the way these boxes are offered by some photographers and photobooth services.
But it should be a little bit more cute than six painted MDF boards screwed together, the way these boxes are offered by some photographers and photobooth services.
PHOTOBOOTH = PHOTOGRAPHY + ELECTRONICS + PRODUCT DESIGN
a project made for me!
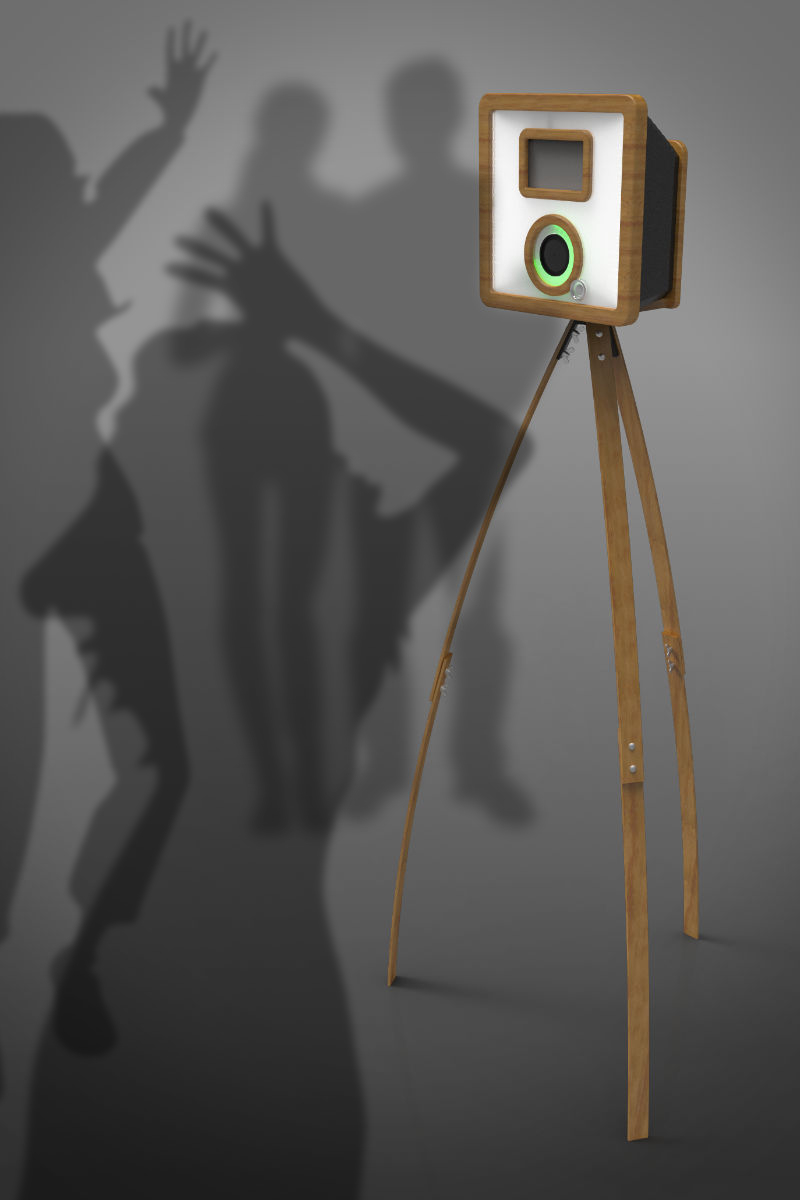
My photobooth quotes the form of old folding cameras , well known from western movies and with a very archetypal character.
In the front of the device, there is amilky acryl glass , carrying a display, a LED ring and an trigger button. The flash and a modification light are shining throug the whole front plate. A inside placed reflector makes the light homogeneous.
For thetripod i used some latches from a slatted frame . The laminated wood is thin, but extremely rigid when it's spanned. Three legs are fixed togehter with an selfmade steel construction.
In the front of the device, there is a
For the
The 3D-printed LED ring shows the status and is also used as a countdown display for the camera trigger. Because it's placed around the objective, people can watch the countdown and gaze directly into the camera at once.
On the backside there's abacklight unit , allowing individual looks for every event just by inserting printed films.
On the backside there's a
Trigger, modification light and the led ring are controlled by an Arduino microcontroller
The countdown can be started by pressing theinternal pushbotton as well as by using an external pedal switch
The live view and the taken picture are shown on a display, connected with the HDMI port of the camera.
The countdown can be started by pressing the
The live view and the taken picture are shown on a display, connected with the HDMI port of the camera.
With the construction of the photobooth i have enhanced my knowledge in Solid Works , expecially with the handling of many subparts .
Also my crafting skills get improved:welding, turning and the milling of wood and steel. Instructed by the masters of the work shops of our university, i did every step on my own.
"Just start with the construction" - a method, that generated many ideas in this project. Especially with new unknown devices, it's useful to have a experimental product to expose problems and find new approaches.
Also my crafting skills get improved:
DESIGN PROCESS
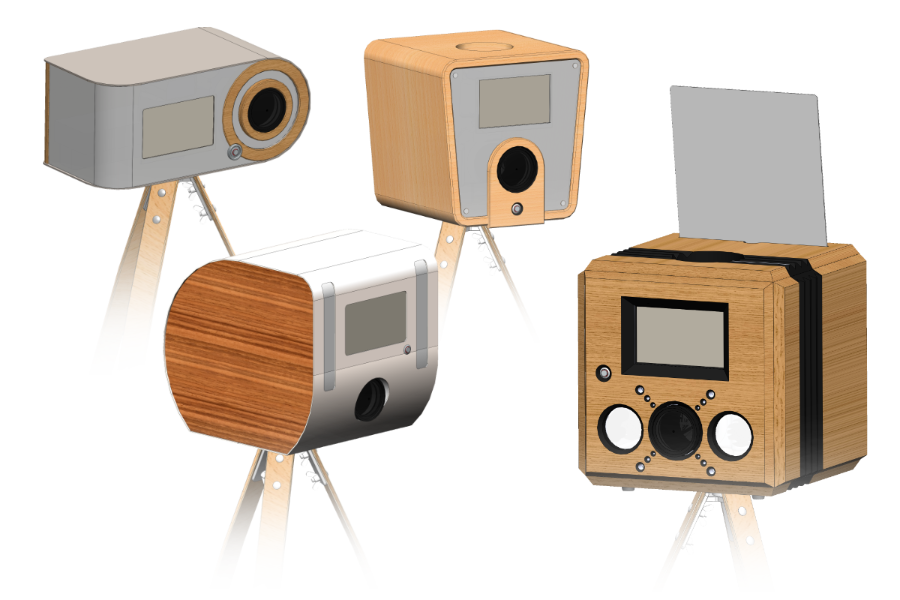
Before the final form was defined, i generated some designs in CAD, including the packaging of the camera and other parts. Out of these designs, new ideas were generated. Some of them, like the acryl glass front or the bellow look, were used in the final model.
THE WEBSITE. HAND-CODED NOT WORD-PRESSED. NO SCRIPTS, NO COOKIES, NO DATA COLLECTING - PURE HTML